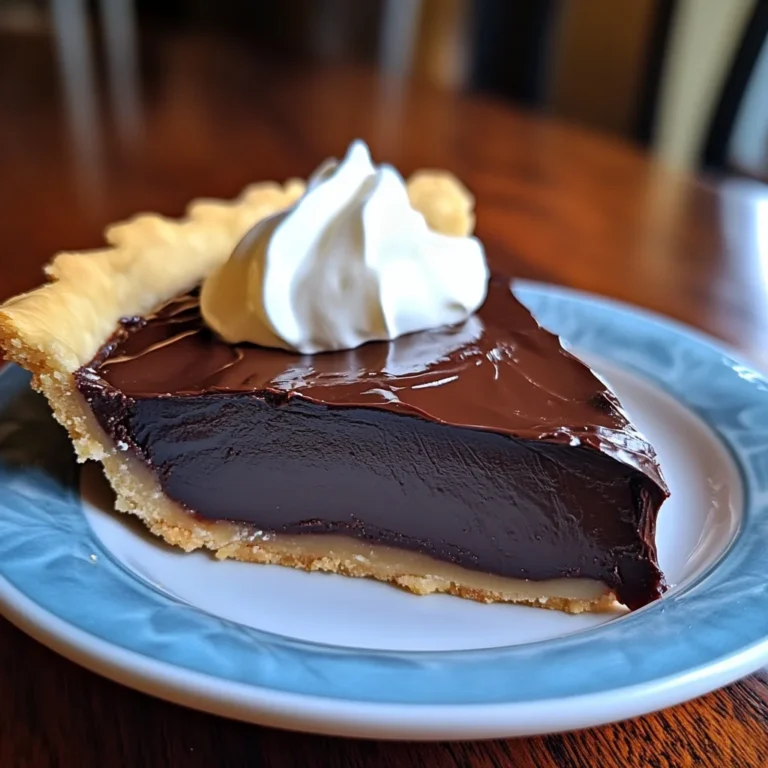
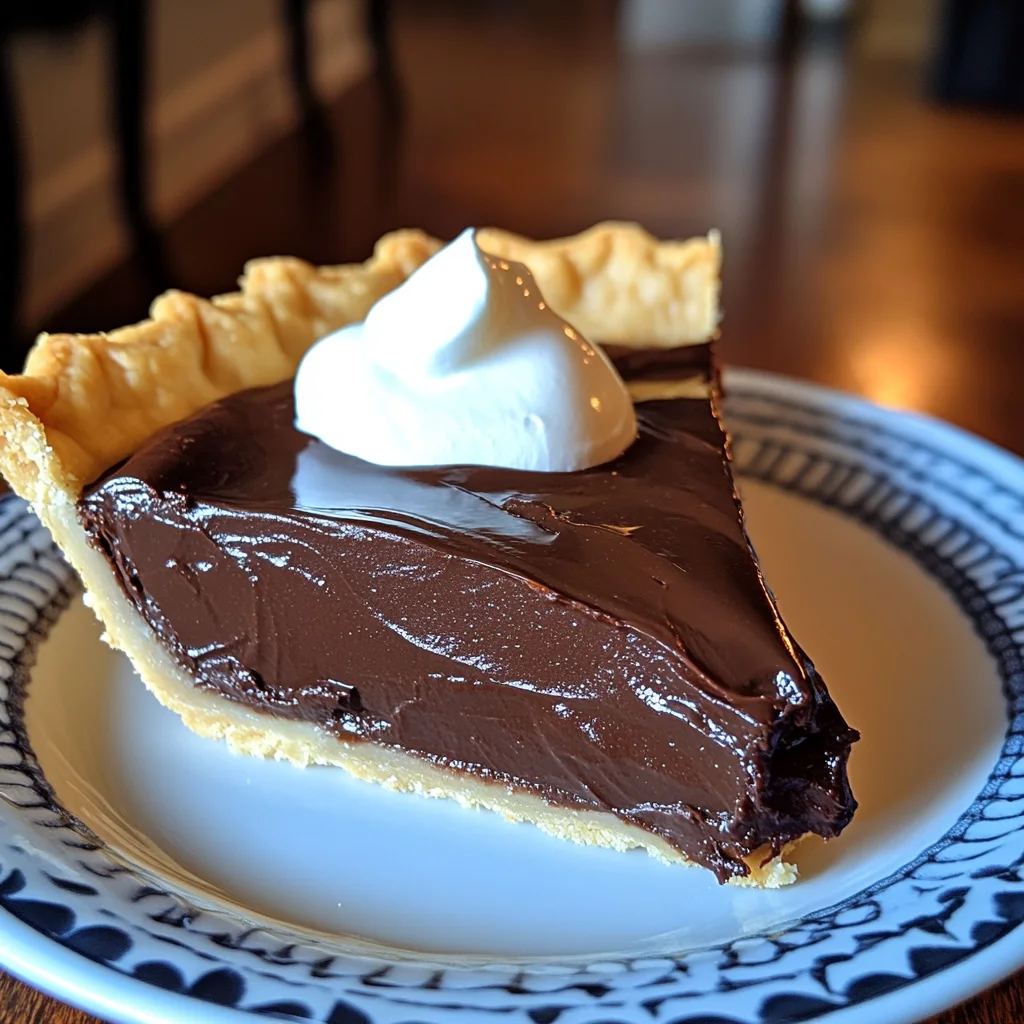
There’s nothing quite like the nostalgic taste of an Old-Fashioned Chocolate Pie. This rich, velvety dessert has been a beloved treat for generations, known for its simple ingredients and irresistible flavor. Whether you’re preparing it for a holiday gathering, a special family dinner, or just because you’re craving something sweet, this pie is guaranteed to hit the spot. With its creamy chocolate filling, perfectly flaky crust, and the option to top it with whipped cream, this dessert is a timeless classic that never goes out of style.
In this comprehensive guide, we will walk you through every step of making this decadent pie, from gathering the ingredients to enjoying the final, mouthwatering result. We’ll also explore how you can customize this pie, tips for perfecting the recipe, and how to serve it for the ultimate dessert experience.
Ingredients You’ll Need for Old-Fashioned Chocolate Pie
Before diving into the recipe, let’s first go over the ingredients you’ll need. Don’t worry—these are all pantry staples that you may already have at home. This simplicity is one of the reasons why Old-Fashioned Chocolate Pie is so accessible and beloved.
-
1 unbaked 9-inch pie crust: You can use a store-bought crust for convenience or make your own for an extra homemade touch.
-
½ cup unsalted butter, melted: Adds richness and flavor to the filling.
-
1 cup granulated sugar: Sweetens the pie filling to perfection.
-
¼ cup unsweetened cocoa powder: Provides the classic chocolate flavor.
-
¼ cup all-purpose flour: Helps to thicken the filling and gives it a nice consistency.
-
3 large eggs, beaten: These provide structure and a smooth texture to the filling.
-
1 tsp vanilla extract: Adds a touch of sweetness and enhances the chocolate flavor.
-
1 cup milk: Creates a creamy, smooth filling that sets nicely when baked.
These ingredients are easy to find and combine to make a rich, smooth chocolate filling that’s a dream to bite into.
How to Make Old-Fashioned Chocolate Pie
Now that you have your ingredients ready, let’s dive into the step-by-step instructions for creating this delicious dessert. This recipe is incredibly simple but yields such a rich and satisfying result. Follow these directions carefully, and you’ll have a perfect chocolate pie every time.
Step 1: Preheat the Oven
Start by preheating your oven to 350°F (175°C). This ensures that the pie bakes evenly and at the right temperature. While the oven is warming up, you can get started with preparing the pie filling.
Step 2: Mix the Dry Ingredients
In a medium-sized mixing bowl, whisk together the granulated sugar, unsweetened cocoa powder, and all-purpose flour until the mixture is well combined. These dry ingredients will form the base of your pie’s filling, and it’s important to make sure they are evenly distributed before adding the wet ingredients. This will prevent any lumps from forming later in the process.
Step 3: Add the Wet Ingredients
Next, stir in the melted butter, beaten eggs, vanilla extract, and milk. Mix everything together until smooth and fully incorporated. The wet ingredients will combine with the dry ingredients to form a thick, creamy filling. Take your time to make sure the mixture is fully blended, as this will ensure a consistent texture throughout the pie.
Step 4: Fill the Pie Crust
Once your filling is ready, pour it into your unbaked 9-inch pie crust. Make sure the crust is placed on a baking sheet to catch any potential drips during baking. Gently tap the pie dish on the counter to level the filling and ensure it’s evenly distributed throughout the crust. This helps the pie bake evenly and prevents any air pockets from forming.
Step 5: Bake the Pie
Place the pie into your preheated oven and bake for 45–50 minutes, or until the center is set and slightly puffed. You can test the pie by gently shaking it—if the filling jiggles too much, it needs more time. The pie is done when the center is mostly firm but still has a slight wiggle. This step is crucial for achieving the perfect creamy consistency without overbaking the filling.
Step 6: Cool & Serve
Once the pie is baked, remove it from the oven and allow it to cool completely. This will take at least an hour. The cooling process helps the filling to set and prevents it from running when you slice into it. After the pie has cooled, you can serve it as is or add a dollop of whipped cream on top for an extra indulgent touch. The creamy chocolate filling combined with the flaky crust and whipped cream makes for a delightful dessert experience.
Tips for Making the Best Old-Fashioned Chocolate Pie
While the recipe is straightforward, there are a few tips to help you achieve the perfect Old-Fashioned Chocolate Pie every time.
1. Use Room Temperature Ingredients
Make sure your butter and eggs are at room temperature before you start. This helps them blend more easily into the filling, resulting in a smooth, lump-free texture.
2. Don’t Overmix the Filling
When combining the wet and dry ingredients, be careful not to overmix the filling. Overmixing can cause the eggs to scramble and lead to a less smooth texture. Mix until just combined to ensure the best results.
3. Choose the Right Pie Crust
You can use a store-bought pie crust for convenience, but for an extra special touch, consider making your own. A homemade pie crust adds a flaky, buttery element that enhances the overall flavor of the pie. If you’re using a store-bought crust, make sure it’s unbaked, as this allows the chocolate filling to set properly.
4. Keep an Eye on the Baking Time
Ovens can vary in temperature, so it’s important to check the pie periodically during the baking process. If the center is still too runny after 50 minutes, give it another 5–10 minutes in the oven. You’ll know the pie is done when the center is set but still slightly puffed.
5. Let the Pie Cool Completely
Patience is key when making Old-Fashioned Chocolate Pie. Allowing the pie to cool completely ensures the filling sets properly and results in clean slices. Rushing this step can cause the filling to run or become too soft.
Variations of Old-Fashioned Chocolate Pie
While the classic recipe is always a crowd-pleaser, there are a few variations you can try to put your own spin on this dessert.
Add a Touch of Espresso
For those who love the combination of chocolate and coffee, adding a teaspoon of espresso powder to the filling can enhance the flavor of the chocolate and give it a richer, more complex taste.
Top with Chocolate Shavings or Chopped Nuts
If you want to add a bit of texture and extra flavor to your pie, top it with chocolate shavings, chopped pecans, or walnuts. These additions provide a nice contrast to the creamy filling and add a touch of elegance to your dessert.
Use a Graham Cracker Crust
For a twist on the classic pie crust, try using a graham cracker crust instead. This no-bake crust is easy to make and adds a nice crunch that complements the smooth chocolate filling.
How to Serve Old-Fashioned Chocolate Pie
Old-Fashioned Chocolate Pie is best served chilled, allowing the filling to firm up and the flavors to meld together. Here are a few ideas for serving it:
-
With Whipped Cream: A dollop of freshly whipped cream adds a light, airy contrast to the rich chocolate filling. You can also top the pie with a sprinkle of cocoa powder or shaved chocolate for extra flair.
-
With Ice Cream: Serve the pie alongside a scoop of vanilla ice cream for a decadent dessert that’s sure to please.
-
As Part of a Dessert Platter: This pie makes a great addition to any dessert spread. Pair it with other classic desserts like cinnamon roll cheesecake or caramel coffee fudge for a variety of flavors and textures.
More Related Recipes You Might Enjoy
If you love the comforting flavors of Old-Fashioned Chocolate Pie, then you’re sure to enjoy these other delicious dessert recipes:
-
Cinnamon Roll Cheesecake – A decadent dessert that combines the rich flavor of cinnamon rolls with creamy cheesecake.
-
Caramel Coffee Fudge – A perfect blend of rich coffee and caramel in a smooth fudge form.
-
No-Bake Orange Creamsicle Truffles – A refreshing and creamy treat that combines the sweet flavor of oranges with a creamy filling.
Frequently Asked Questions (FAQs)
How long will chocolate pie last in the fridge?
Old-Fashioned Chocolate Pie will stay fresh in the refrigerator for up to 4 days, provided it’s stored properly. To maintain its creamy texture and prevent it from drying out, cover the pie tightly with plastic wrap or place it in an airtight container. It’s best enjoyed within the first two days when the crust is still firm and the filling is at its peak flavor.
What causes a chocolate pie to be runny instead of firm?
A chocolate pie that turns out runny is usually a result of underbaking or improper cooling. The filling needs enough time in the oven (typically 45–50 minutes) to set fully. If it’s pulled out too early, the center won’t firm up, even after cooling. Another common culprit is not allowing the pie to cool completely before slicing—it may appear unset when it’s actually perfect, just too warm. Always let it cool for at least an hour at room temperature and then chill it further if needed.
How long is chocolate chess pie good for after baking?
Chocolate chess pie, like its cousin the Old-Fashioned Chocolate Pie, is best stored in the refrigerator and can remain good for 3 to 4 days. Due to its egg-rich filling, it should be kept chilled to avoid spoilage. If you want to extend its life, you can also freeze it—just wrap it securely in plastic wrap and foil before placing it in the freezer. It will keep for up to 2 months when frozen, and you can thaw it in the fridge overnight before serving.
Why is my chocolate pie crust soggy after baking?
A soggy crust is often caused by too much moisture in the filling or an underbaked bottom crust. To avoid this, consider blind baking the crust before adding the filling—this means pre-baking the crust alone for about 10 minutes. You can also brush the crust with a thin layer of egg white before filling it, which helps create a barrier that prevents the chocolate filling from soaking in. Using a metal or glass pie dish can also help you monitor the bottom of the crust more easily as it bakes.
Final Thoughts
Old-Fashioned Chocolate Pie is a true classic, offering the perfect balance of sweetness, richness, and nostalgia. It’s an easy-to-make dessert that’s sure to impress, whether you’re serving it for a special occasion or as a simple indulgence. With just a few basic ingredients and straightforward instructions, you can create a pie that rivals the best chocolate desserts out there.
Remember to follow the tips provided for the best results, and feel free to experiment with variations to make the pie your own. Whether you keep it simple or add a few extra touches, Old-Fashioned Chocolate Pie will always be a crowd-pleasing treat that brings comfort and joy with every bite.
Print
Old-Fashioned Chocolate Pie – Easy, Homemade & Delicious
- Prep Time: 10 minutes
- Cook Time: 45–50 minutes
- Total Time: 55–60 minutes
- Yield: 8 servings 1x
- Category: Dessert
- Method: Baking
- Cuisine: American
- Diet: Vegetarian
Description
This Old-Fashioned Chocolate Pie is a rich, creamy dessert that brings nostalgia to every bite. With a buttery pie crust and smooth chocolate filling, it’s the perfect treat for holidays, family gatherings, or any time you want a comforting homemade dessert. Simple ingredients come together to create a timeless classic that everyone will love.
Ingredients
-
1 unbaked 9-inch pie crust
-
½ cup unsalted butter, melted
-
1 cup granulated sugar
-
¼ cup unsweetened cocoa powder
-
¼ cup all-purpose flour
-
3 large eggs, beaten
-
1 tsp vanilla extract
-
1 cup milk
Instructions
-
Preheat the Oven: Preheat your oven to 350°F (175°C).
-
Mix Dry Ingredients: In a large bowl, whisk together the sugar, cocoa powder, and flour until well combined.
-
Add Wet Ingredients: Stir in the melted butter, beaten eggs, vanilla extract, and milk. Mix until smooth and fully incorporated.
-
Fill the Pie Crust: Pour the chocolate mixture into the unbaked pie crust, spreading it out evenly.
-
Bake the Pie: Place the pie in the oven and bake for 45–50 minutes, or until the center is set and slightly puffed.
-
Cool & Serve: Let the pie cool completely before slicing. For added flavor, serve with whipped cream.
Notes
-
Crust Tip: If your pie crust tends to get soggy, consider blind baking it for 10 minutes before adding the chocolate filling to help it stay crisp.
-
Storage: This pie can be stored in the refrigerator for up to 4 days. Make sure to cover it with plastic wrap or an airtight container to keep it fresh.
-
Serving Suggestions: For an extra decadent touch, top with whipped cream, chocolate shavings, or a sprinkle of crushed nuts.
Nutrition
- Serving Size: 1 slice
- Calories: 300 kcal
- Sugar: 20g
- Sodium: 60mg
- Fat: 18g
- Saturated Fat: 8g
- Unsaturated Fat: 7g
- Trans Fat: 0g
- Carbohydrates: 35g
- Fiber: 2g
- Protein: 4g
- Cholesterol: 75mg