
Chicken Katsu Musubi: A Delightful Fusion of Flavors
Chicken Katsu Musubi is a scrumptious dish that beautifully melds traditional Japanese katsu with the beloved Hawaiian musubi. Originating from the culinary practices of Hawaii, this dish has become a local favorite, capturing the hearts of many with its crispy breaded chicken nestled atop seasoned sushi rice, all wrapped in nori. This fusion delicacy not only showcases an array of flavors but also offers delightful textures—from the crunch of the katsu to the softness of the rice. With its roots deeply embedded in both Japanese and Hawaiian cuisines, Chicken Katsu Musubi stands as a testament to the rich cultural tapestry of these regions, making it a staple in many Hawaiian households.
Table of Contents
Ingredients for Chicken Katsu Musubi
To create an authentic Chicken Katsu Musubi, you will need a selection of ingredients that are essential for bringing this dish to life.
For the Chicken Katsu:
- 1 pound boneless skinless chicken thighs
- 1 cup all-purpose flour
- 2 large eggs, beaten
- 2 cups Japanese panko breadcrumbs
- 1/2 teaspoon salt
- 1/2 teaspoon black pepper
- Neutral oil for frying, such as vegetable or canola
For the Tonkatsu Sauce:
- 3 tablespoons ketchup
- 2 tablespoons Worcestershire sauce
- 1 tablespoon soy sauce
- 1 tablespoon oyster sauce
- 1 tablespoon brown sugar
- 1 teaspoon hot honey
For the Musubi:
- 6 cups cooked sushi rice, still warm
- 3 nori sheets, cut into thirds crosswise
- 2 tablespoons rice vinegar
- 1 tablespoon sugar
- 1 teaspoon salt
- Sesame seeds for garnish
Preparing the Sushi Rice
Sushi rice plays a crucial role in the Chicken Katsu Musubi, providing the necessary base for this delicious creation. The right preparation of rice not only enhances flavor but also ensures that it can be molded and held together well. To properly season your sushi rice, start by mixing rice vinegar, sugar, and salt in a small bowl until completely dissolved. Once well-mixed, fold this mixture gently into the warm cooked sushi rice. Allow the rice to cool to room temperature; this will ensure it holds shape when pressed into the musubi mold. For perfect sushi rice, it’s vital to use short-grain rice, as it gives the right sticky texture.
Making the Tonkatsu Sauce
The tonkatsu sauce is key to taking your Chicken Katsu Musubi to another level of deliciousness. This savory-sweet sauce brings a rich flavor profile that balances well with the crispy chicken and soft rice. In a small saucepan, combine ketchup, Worcestershire sauce, soy sauce, oyster sauce, brown sugar, and hot honey. Cook over low heat while stirring until the sugar fully dissolves and the sauce achieves a smooth consistency. This sauce can be adjusted based on personal preferences—feel free to reduce the sweetness or enhance the tanginess depending on your taste.
Preparing the Chicken Katsu
To craft the perfect Chicken Katsu, it all starts with adequate preparation of the chicken itself. Trim any excess fat from the boneless skinless chicken thighs and slice each thigh into three equal pieces for evenly sized portions. Using a meat mallet, pound each piece to a consistent half-inch thickness, which helps ensure even cooking when frying. After pounding, generously season both sides with salt and pepper, allowing the seasoning to seep into the meat. Next, establish your breading station: place flour in one shallow bowl, beaten eggs in another, and finally, in another shallow dish, your Japanese panko breadcrumbs. To bread your chicken, first, dredge each piece in flour, shaking off any excess, dip it into the egg (allowing excess to drip off), and then press firmly into the panko breadcrumbs on both sides. This step is crucial as panko gives a delightful crunch.
Frying the Chicken Katsu
Once your chicken is beautifully breaded, it’s time to fry. Heat about 2 inches of neutral oil in a heavy pot or skillet until it reaches a temperature of about 350°F (175°C). Fry the chicken pieces in batches for about 4 to 6 minutes, ensuring each piece turns a lovely golden brown and that the internal temperature reaches 165°F. Following the frying, drain the chicken on a wire rack to remove excess oil and let it cool slightly. The goal is to achieve that perfect, crispy texture that makes Chicken Katsu Musubi so irresistible.
Assembling the Musubi
The assembly is a crucial step in crafting Chicken Katsu Musubi that looks as great as it tastes! Start by laying a strip of nori flat on a clean surface, shiny side down. Place a musubi mold or a Spam can in the center of the nori. Fill the mold with half a cup of the seasoned sushi rice, pressing down firmly to compact it. Once formed, gently remove the mold and brush a small amount of tonkatsu sauce onto the rice. Next, place a piece of the crispy chicken katsu right on top of that. To finish, fold both sides of the nori over the rice and chicken, pressing firmly to seal the edges. If you find the nori isn’t sticking, a tiny dab of water can help. Sprinkle sesame seeds on top for an extra touch just before serving!
Serving Suggestions and Related Recipes
Your Chicken Katsu Musubi is best enjoyed fresh! Serve immediately, while the katsu remains crisp, alongside extra tonkatsu sauce for dipping. Consider pairing your musubi with traditional Hawaiian sides like macaroni salad, pickled vegetables, or even a light cucumber salad. If you’re looking to create a meal, steamed rice or a bowl of miso soup would complement this dish nicely. Here are some related recipes you might enjoy:
- Texas Roadhouse Style Garlic Butter Chicken Skillet
- Honey Balsamic Brussels Sprouts
- Sizzling Bacon Cheeseburger Queso Dip
- Roasted Carrots with Whipped Ricotta Hot Honey
FAQs about Chicken Katsu Musubi
How can I make Chicken Katsu Musubi gluten-free?
To make Chicken Katsu Musubi gluten-free, you can substitute the all-purpose flour with a gluten-free flour blend and use gluten-free panko breadcrumbs. Additionally, ensure that the soy sauce used in the tonkatsu sauce is gluten-free, as traditional soy sauce contains wheat. You can find gluten-free soy sauce options like tamari in most grocery stores. This way, you can enjoy the same delicious flavors without gluten.
What sides pair well with Chicken Katsu Musubi?
Chicken Katsu Musubi pairs wonderfully with a variety of sides. Traditional Hawaiian sides such as macaroni salad, pickled vegetables, or a light cucumber salad complement the flavors well. You can also serve it with a side of edamame or a simple green salad dressed with sesame vinaigrette. For a more substantial meal, consider adding steamed rice or miso soup to round out the dining experience.
Can I use other proteins instead of chicken for Katsu Musubi?
Absolutely! While traditional Katsu is made with chicken, you can substitute it with other proteins such as pork, shrimp, or even tofu for a vegetarian option. Each protein will have its own unique flavor and texture, so you can experiment with marinades and cooking times accordingly. Just ensure that the cooking methods are similar to maintain the crispy katsu texture.
How do I prevent the nori from becoming soggy when making Chicken Katsu Musubi?
To prevent the nori from becoming soggy, it’s important to assemble the Chicken Katsu Musubi just before serving. If you’re preparing it in advance, consider wrapping the musubi tightly in plastic wrap or parchment paper, and store them in an airtight container in the refrigerator. Additionally, you can lightly toast the nori before wrapping it around the musubi to create a barrier against moisture. This helps maintain its crispness longer.
Conclusion
In conclusion, making Chicken Katsu Musubi is a delightful culinary adventure that merges Japanese and Hawaiian flavors to create something truly unique. Whether you’re hosting a gathering, preparing a lunch, or treating yourself to a comforting meal, this recipe is a fantastic choice. Don’t hesitate to try out variations and share your experiences in the kitchen!
For more snack ideas and kitchen inspiration, follow me on Pinterest.
Print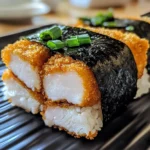
Create Irresistible Chicken Katsu Musubi with this Easy Recipe
- Prep Time: 20 minutes
- Cook Time: 30 minutes
- Total Time: 50 minutes
- Yield: 4 servings 1x
- Category: Main Course
- Method: Frying
- Cuisine: Japanese-Hawaiian
Description
Chicken Katsu Musubi is a scrumptious dish that beautifully melds traditional Japanese katsu with the beloved Hawaiian musubi. This dish has become a local favorite, capturing the hearts of many with its crispy breaded chicken nestled atop seasoned sushi rice, all wrapped in nori.
Ingredients
- 1 pound boneless skinless chicken thighs
- 1 cup all-purpose flour
- 2 large eggs, beaten
- 2 cup Japanese panko breadcrumbs
- 1/2 teaspoon salt
- 1/2 teaspoon black pepper
- Neutral oil for frying
- 3 tablespoon ketchup
- 2 tablespoon Worcestershire sauce
- 1 tablespoon soy sauce
- 1 tablespoon oyster sauce
- 1 tablespoon brown sugar
- 1 teaspoon hot honey
- 6 cup cooked sushi rice, still warm
- 3 nori sheets, cut into thirds crosswise
- 2 tablespoon rice vinegar
- 1 tablespoon sugar
- 1 teaspoon salt
- Sesame seeds for garnish
Instructions
- Prepare the sushi rice by mixing rice vinegar, sugar, and salt in a small bowl until dissolved, then fold into warm cooked sushi rice and let cool.
- In a small saucepan, combine ketchup, Worcestershire sauce, soy sauce, oyster sauce, brown sugar, and hot honey. Cook over low heat until sugar dissolves.
- Trim excess fat from chicken thighs and slice each into three equal pieces. Pound each piece to a consistent half-inch thickness and season with salt and pepper.
- Set up a breading station with flour in one bowl, beaten eggs in another, and panko breadcrumbs in a third. Dredge each chicken piece in flour, dip in egg, and coat with breadcrumbs.
- Heat about 2 inches of neutral oil in a pot to 350°F. Fry chicken pieces in batches for 4 to 6 minutes until golden brown and cooked through.
- Lay a strip of nori shiny side down on a clean surface. Place a musubi mold or Spam can in the center and fill with 1/2 cup of seasoned sushi rice, pressing down to compact.
- Remove the mold and brush tonkatsu sauce onto the rice. Place a piece of fried chicken on top, fold the nori over the rice and chicken, and press to seal.
- Sprinkle sesame seeds on top before serving.
Notes
Serve immediately while katsu remains crisp alongside extra tonkatsu sauce for dipping. Consider pairing with traditional Hawaiian sides like macaroni salad or pickled vegetables.
Nutrition
- Serving Size: 1 musubi
- Calories: 500
- Sugar: 8g
- Sodium: 800mg
- Fat: 25g
- Saturated Fat: 4g
- Unsaturated Fat: 20g
- Trans Fat: 0g
- Carbohydrates: 50g
- Fiber: 2g
- Protein: 30g
- Cholesterol: 150mg